Instructions
I. Setting up OPAGO POS GEN1 Bitcoin-Lightning Terminal
1. Open the dashboard and log in with your email address and password. If you do not have an OPAGO account yet, please create one.
2. Connect the POS terminal to your computer via USB.
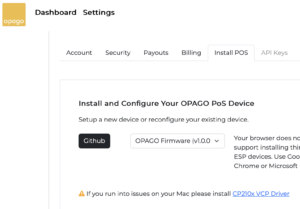
3. In the dashboard, under “Settings,” you will find the tab “Install POS.” Select the latest firmware version here. Then click on “Start Installation.” Please note that Webserial is currently only supported in Google Chrome and MS Edge.
4. A dialog box will then appear where you need to select the appropriate serial interface. Under Windows, this is usually “COM3” and under MAC an interface with the following format “ch.wchusbserial123456789.” Then press “Connect.”
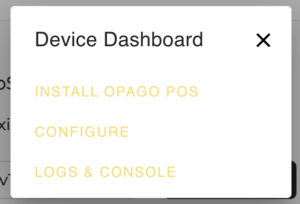
5. Next a dialog box “Device Dashboard” will appear. Here, please select “Install OPAGO POS.”
6. In the subsequent dialog box “Format Device,” you can continue without making a selection.
7. Then confirm the installation by clicking “Install.”
8. The installation will then take about 2 minutes and will automatically redirect you to the configuration page.
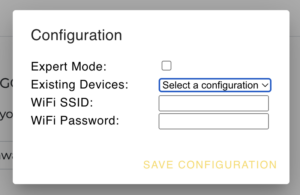
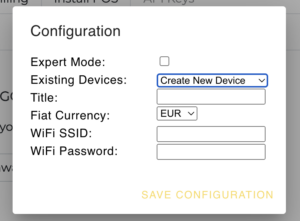
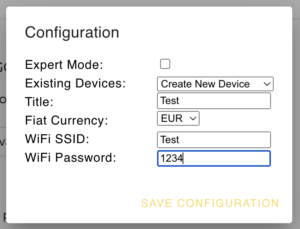
9. Here, under “Existing Devices,” select the option “Create New Device.” Further options will then appear.
10. Under “Title,” you can give your device a name. This will help you later to distinguish transactions from different POS devices.
11. Under “Fiat Currency,” you can select which exchange rate should be used. For example, EUR for Euro or CHF for Swiss Francs. If you want to settle directly in Bitcoin, please select “sat” as the currency. One Bitcoin consists of 100 million Satoshi (short “sat”).
12. Then enter the access data “Network Name” (WiFi SSID) and “Password” (WiFi Password) of your preferred WLAN network. If you want to use only the offline payment method, simply leave these fields blank.
13. Then confirm with “Save Configuration.”
14. If the configuration has been successfully written to the device, you can read “Configurations saved successfully” in the automatically opening Serial Monitor within a few seconds.
15. Finally, we recommend restarting the device with Reset Device. After that, your OPAGO POS terminal is ready for use.
II. Accepting Payments
1. You can now accept your first payment. Simply enter the desired amount and confirm with the checkmark.
2. Your customer now authorizes the payment, either by scanning the QR code with any Lightning Wallet or by presenting a BoltCard.
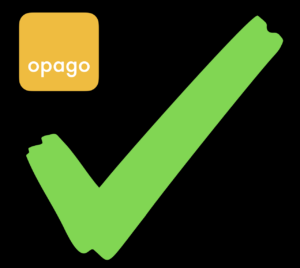
3. The green checkmark indicates that the payment was successful. You will receive the payout within seconds to your registered Lightning Wallet.
4. OFFLINE: If your device does not have an internet connection, “Offline” will be displayed under the QR code on the left and “PIN” in the right corner. In this case, after payment, your customer must click the link sent with the payment confirmation and tell you the 4-digit PIN. Click once on the checkmark to go to the PIN entry. Enter the 4-digit PIN. If the PIN is correct, a green checkmark will appear.
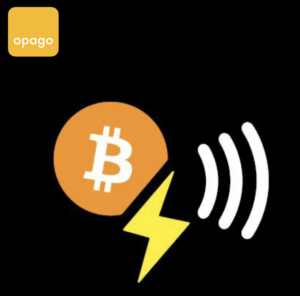
5. NFC: Your device supports LNURLw read from most common NFC chips and cards. These are usually set up according to the BoltCard standard. If your customer wants to pay with NFC, your OPAGO POS device must be connected to the internet. Offline NFC payment is not possible. The coil for NFC is located in the left area of the keyboard. Just let your customer hold their BoltCard to the device. As soon as the NFC card is detected, an NFC symbol will appear on the display.
If the card is read correctly, a green checkmark will appear above the NFC symbol.
If not, a red checkmark will appear; in this case, the customer must present the card again.
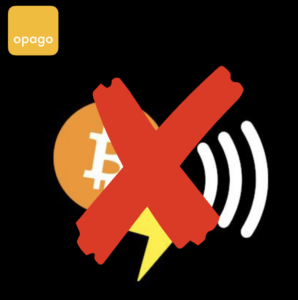
After the green checkmark on the NFC symbol, either a red X or a green checkmark will appear within a few seconds. The green checkmark means that the amount was successfully debited.
The red cross means that the amount could not be debited.
Troubleshooting
If you cannot set up the card terminal as described above, please try the following:
* Please check if your browser meets the requirements.
* Check the correct installation of the driver.
* Check the USB connection to your computer.
Should a payment not immediately arrive in your external Lightning wallet, but shows up in your OPAGO dashboard, it could be due to one of the following reasons:
* No route: We try and make sure that the OPAGO node is well connected in the Lightning Network, still it can happen that there is no route to your wallet, especially if you use a self-custodial setup. The OPAGO node will continue to look for routes to your wallet and forward the payment as soon as one is available.
* No inbound liquidity: If you are using a self-custodial setup or small wallet provider, there might not be enough inbound liquidity to forward the payment for you. The OPAGO node will continue to try sending to your wallet and forward the payment as soon as liquidity is available.
* Too high fees: While we ensure that our direct connections are low to zero fee, depending on your wallet provider, there may be additional lightning network fees charged when forwarding a payment to you. These fees are neither charged by us, nor under our control. We can and do set a limit to the forward fees to protect you. This means that some payments cannot immediately be forwarded if no low fee routes are available. Since some channels charge minimum fees, especially small transactions may get stuck. Very large payments are also diffiuclt to route for low fees, since these can only use bigger channels. These funds will appear as “stuck sats” in your dashboard. The OPAGO node will aggregate small payments and continuously look for low fee routes to forward you the payments as fast as possible.
Charging OPAGO POS GEN1 Terminal
You can charge the POS terminal with the included USB-C cable (either via your computer or another power source). The card terminal can also be used while charging. A full battery charge allows for about 200 payment transactions.
General Handling
* We guarantee the functionality of the device at temperatures between 0 °C and +30 °C. Therefore, we recommend that you do not leave your POS terminal in the car for extended periods in summer or winter.
* If you are not using your card terminal, please turn it off with the button on the top edge of the device. This button galvanically disconnects the battery from the device. This ensures that the device is ready for use even after a long period of non-use when fully charged.
* To charge the battery, first turn on the device with the switch on the top edge. This is necessary because the battery is galvanically disconnected from the device when turned off to minimize discharge when not in use.
WARNING: Some devices are shipped with a demo mode setup. DO NOT send any payments to the device before you have connected it with your own OPAGO account or the funds will be irrecoverably lost.

